Making the jam required the hand mincer. We weren't allowed to turn the handle until we were a little older. Mostly it was apricot, strawberry and occasionally raspberry jam. It was always a great production line and seemed to take forever - but then most things do when you are only 3 or 4 years old! All our preserved fruit and jams where home made - we never had bought tinned fruit or jam until I was in my teens.
This was not the only time we made our own though. Come winter, it was time for marmalade. As a child, I didn't really like it, although when my grandparents came to visit, they would sometimes let me have the bit of their toast that only had the jelly part without the bitter skin.
Again, I remember my mother and sometimes her mother as well doing the tedious preparation. Back then, all the fruit was sliced finely by hand, removing any thicker pieces of pith. Over time I have grown to appreciate marmalade. For many years it was my go to for breakfast, year in year out: marmalade on toast.
Once my mother had a food processor, she gave up slicing the fruit. It was much quicker and easier in the food processor. However, it gives a very different style to the marmalade - one that I really enjoy. First you don't get any jelly parts without fruit. Second you don't get big lumps (generally) of skin. It spreads a little more easily, too.
 So here is the recipe my mother has always used. I think it was given to her by her mother. I have never found anything similar in shop bought varieties; the orange and grapefruit give it so much flavour.
 My mother says that you make it in the months with a "u" in them (as in June, July & August), although that would only work in the southern hemisphere. Last year I made mine in late August, which I think is a little too late - the fruit is too ripe, so not as much pectin, which makes it harder to get to set. Now I just have to get my daughter to appreciate marmalade on toast (instead of Nutella!), so that it can head into the fourth generation.
Orange and Grapefruit Marmalade
 3 Navel Oranges
2 Grapefruit (traditionally use yellow ones, but for the last few years I have defected to pink, which give a lovely sweetness)
1.75kg sugar
1/2 -1 Litre of water
Wash the fruit and cut into chunks, removing the white middle and any pips. Put the fruit into the processor in batches (I find probably one orange or grapefruit at a time is enough, so that it chops into even bits - you really don't want to turn it to paste with occasional large lumps!). Put processed fruit into a large bowl or container (I use plastic as I am not sure of the reaction of the acidity in the fruit with the saucepan overnight) and then add enough water to get a middling consistency - a bit like soup. Leave to soak overnight. If it seems a little dry in the morning, you can add more water - the worst that will happen if you have too much is that you will need to boil it longer.
In the morning, put it all in a large heavy based saucepan and bring to the boil. Give it a stir every so often to ensure nothing sticks. Boil until the fruit looks soft (about half an hour).

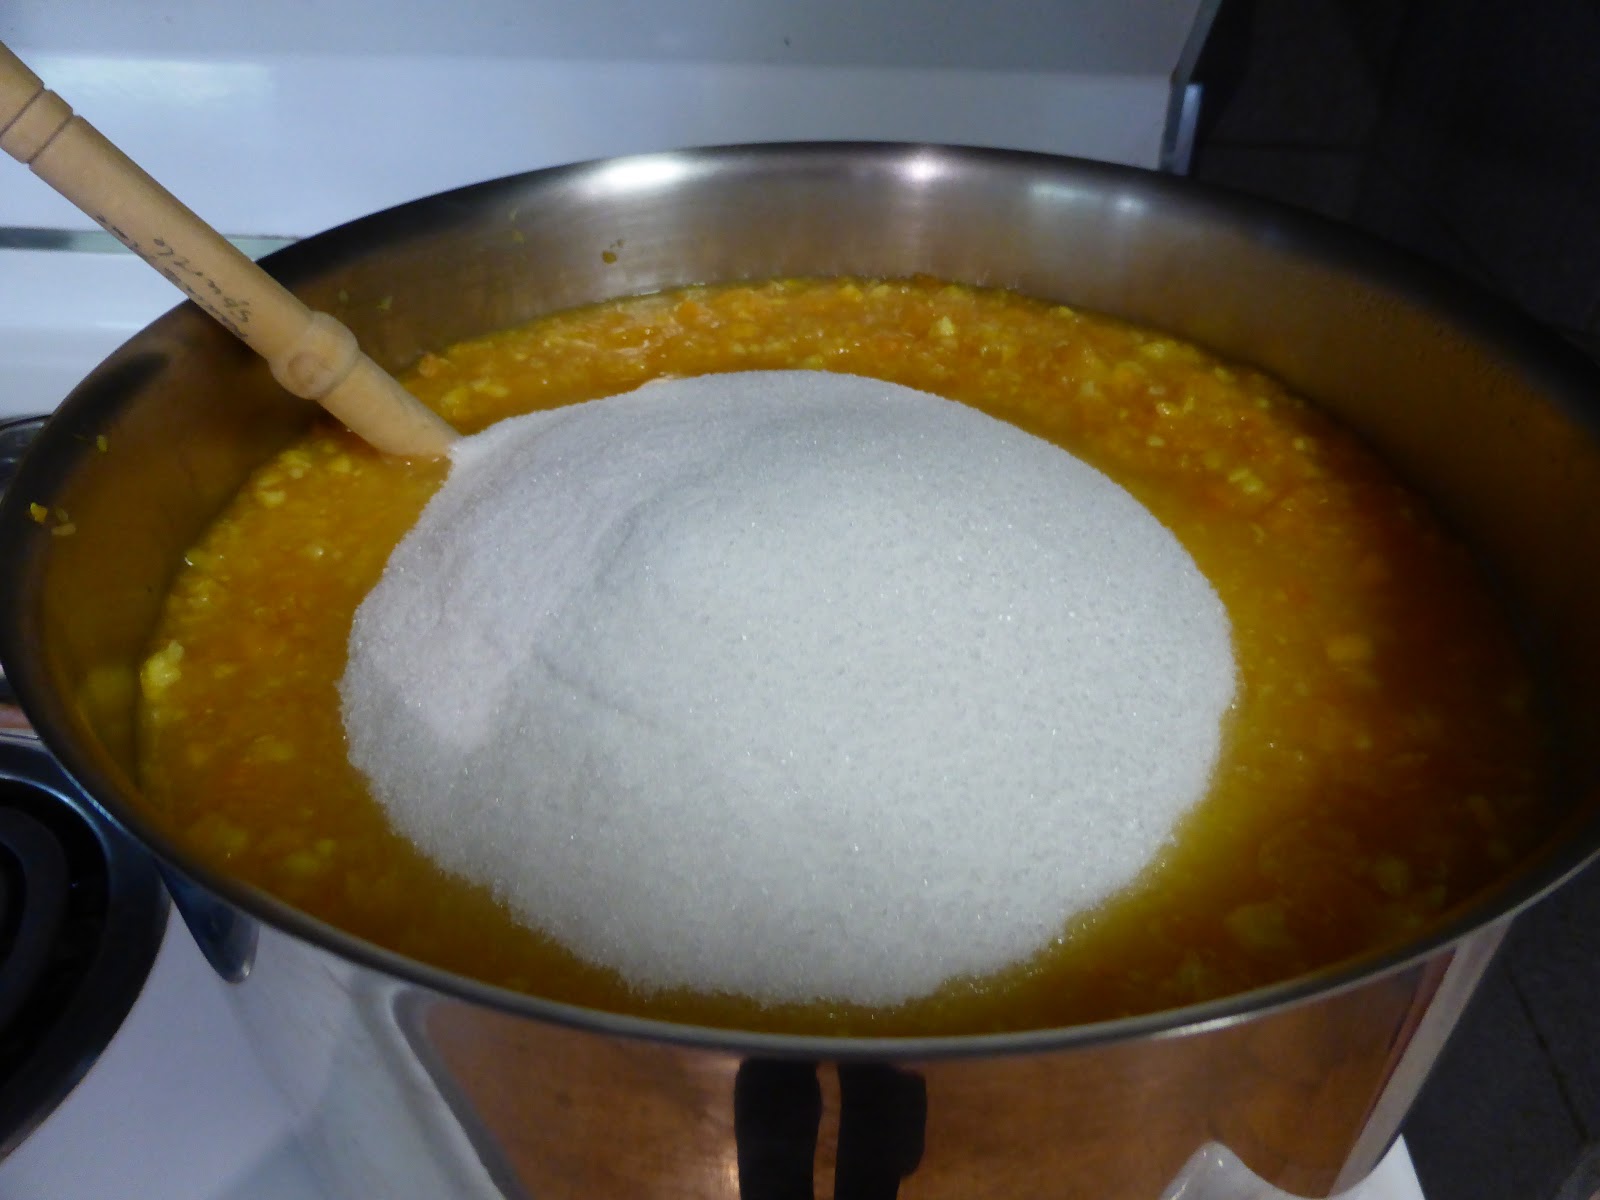
Add the sugar carefully and mix in. I know it seems a lot, but I have tried cutting back, and only ended up with marmalade that wouldn't set. (This might look like a lot of marmalade, but I do two batches at once, which usually lasts a whole year for me.)
Bring it all back to the boil - at this point you will need to get the temperature up a bit, but watch it: Boiled over jams are never fun to clean up!
Now is the more tedious part as you just need to boil until it sets. It took me maybe about 1 1/2 hours. It will need stirring quite regularly, as well as watching - you also don't want to burn it. I have done that, too, and that is the end of the whole batch - the burnt flavour quickly goes all through!
At the beginning, it will be quite foamy and light coloured. As it cooks, the bubbles get bigger, the colour gets darker and it shrinks down (you will need to turn the heat up again to keep it boiling).
Towards the end, the amount has shrunk down considerably and there is a yellowish foam around the edges. The bubbles are clear.
When you think it is getting close to ready, test a little by dropping it on a cold plate. Allow it to cool and when you push your finger through the marmalade, it should stay where it is (not flow back). This part is the most subjective - in industry, they have a colour chart that shows when it is dark enough. Mine involves more guess work!
When you feel it is setting well on the plate, turn off the heat and pour into glass jars straight away. (Remember:it will be extremely hot at this point!) I use a little jug, and reuse well-cleaned jars from bought products. Put the lids on tightly immediately and you should get a good seal (make sure you wipe any spill first). I have always found it keeps for well over a year.

In the morning, put it all in a large heavy based saucepan and bring to the boil. Give it a stir every so often to ensure nothing sticks. Boil until the fruit looks soft (about half an hour).
Add the sugar carefully and mix in. I know it seems a lot, but I have tried cutting back, and only ended up with marmalade that wouldn't set. (This might look like a lot of marmalade, but I do two batches at once, which usually lasts a whole year for me.)
Bring it all back to the boil - at this point you will need to get the temperature up a bit, but watch it: Boiled over jams are never fun to clean up!
 |
| Early stages of boiling |
Now is the more tedious part as you just need to boil until it sets. It took me maybe about 1 1/2 hours. It will need stirring quite regularly, as well as watching - you also don't want to burn it. I have done that, too, and that is the end of the whole batch - the burnt flavour quickly goes all through!
At the beginning, it will be quite foamy and light coloured. As it cooks, the bubbles get bigger, the colour gets darker and it shrinks down (you will need to turn the heat up again to keep it boiling).
 |
| Towards the end |
When you think it is getting close to ready, test a little by dropping it on a cold plate. Allow it to cool and when you push your finger through the marmalade, it should stay where it is (not flow back). This part is the most subjective - in industry, they have a colour chart that shows when it is dark enough. Mine involves more guess work!
When you feel it is setting well on the plate, turn off the heat and pour into glass jars straight away. (Remember:it will be extremely hot at this point!) I use a little jug, and reuse well-cleaned jars from bought products. Put the lids on tightly immediately and you should get a good seal (make sure you wipe any spill first). I have always found it keeps for well over a year.


No comments:
Post a Comment