Tuesday 8 January 2019

Potato Salad with a lot of Difference...and chicken.

SERVES:4-5                           PREP TIME: 40-50 mins

Summer is well and truly upon us in the Southern Hemisphere and I find myself looking for further variations and inspiration for salads and cold meals. The idea for this came when I was at a friend's house and she was busily making a potato salad for Christmas with...ROAST POTATOES!

I have long struggled with the traditional boiled potato salad, which although my family loves it, the all too likely tendency for mine to go mushy really has put me off. Sometimes it would end up almost like cold mash with mayonnaise and a few other bits added in.

So the idea of roasting the potatoes struck me as a great way of keeping their structure intact as well as it being far less likely they would be overcooked.

I have played around with a number of variations of this recipe - in fact, it is probably nearly always different, although with some basic similarities. Last night's dinner was probably about the best I remember making this, so I thought I'd put it in writing.

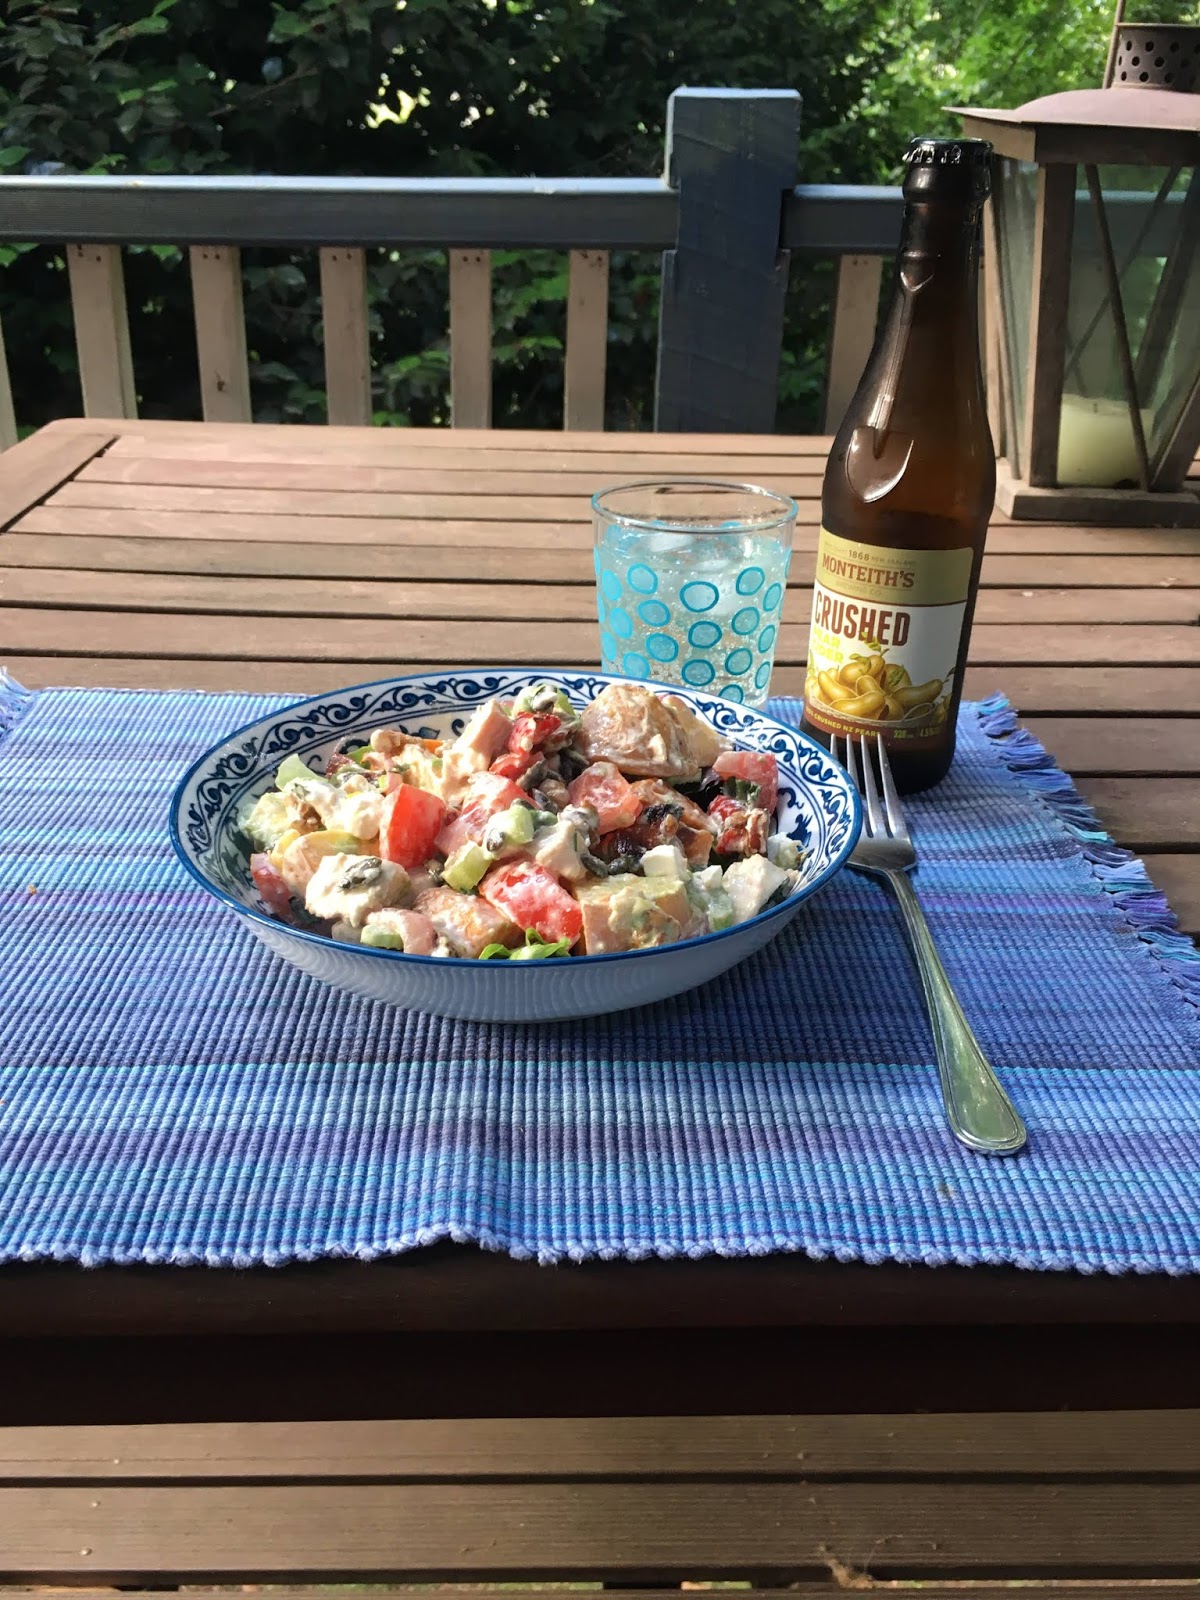
By the way, this salad is best served fresh and still a little warm. It is ok the next day, but when it first made, has all the crunch of different ingredients and they haven't melded to the point they are starting to become indistinguishable.

There are three main parts: the roast veges & chicken, the dressing and the crunchy bits...and a few other uncooked bits... So maybe four parts! The great thing is that it is very easy to vary, depending on what you do or don't have. You can leave out the avocado, maybe add in some Kalamata olives, have the onion raw, replace the sweet potato with normal potato and so on. Sometimes I add a couple of cold hard boiled eggs chopped up as well. You can change the chicken for smoked salmon, too. And if you don't like walnuts, leave them out or replace them!

This is to serve 4, or maybe 5. I work it out on using about as much potato and sweet potato per person as you would eat normally....

ROAST VEGES:
2 large potatoes (I like Desiree or similar) cut into ~2cm squares (don't need to peel)
An equal amount of sweet potato cut into ~2cm squares (I do peel this)
1/2 red capsicum cut into 2cm squares
1 red onion sliced vertically
~1tbs olive oil
Salt

Heat oven to 200 deg C. Prepare veges and place on an oven tray (covered in baking paper if you desire). Drizzle and toss with olive oil. Sprinkle with salt as required.

CHICKEN:
Chicken breasts to around 400g weight
~10+ Thyme sprigs
~2-3 tsp lime or lemon juice
Cracked pepper

Place chicken on enough foil to wrap it in. Place thyme leaves around, drizzle with juice and a few grinds of pepper. Wrap it and put it on the tray with the veges, or separately if required. Put them all in the oven for around 30 mins, until the veges are crispy and the chicken is cooked. After they are cooked, stand to cool to room temperature or a bit warmer.

While they are cooking, prepare the rest.

DRESSING:
~1 1/2 tbs mayonnaise
~2-3 large tsp sour cream
1-2 tsp sweet chilli sauce (I use Fountains...sometimes I also use Nandos Peri Peri, medium, but probably need quite a bit less of this, unless you like it really spicy!)
1-2 tsp lime juice

Put this all in a small bowl and mix until well blended.

CRUNCHY STUFF:
1 Chorizo sausage cut in half and sliced thinly
2-3 tbs pepitos
1-2 tbs walnuts
2-3tsp olive oil

Using a small frypan or skillet on a med-med high temperature (about 7 or 8), put the oil and chorizo in (when frypan is heated). As soon as the chorizo is starting to brown, turn down to 4 or 5 and add the pepitos and nuts. Keep them moving and as soon as they are all starting to brown, remove them from the heat. If they are a bit oily, pop them out onto some paper towel on a plate to cool and drain. (Be careful they don't burn if you leave them in the frypan).

OTHER STUFF:
1 Avocado diced
1-2 Tomatoes diced (or 1/2 to 1 punnet mini tomatoes)
1 stick of celery
~70 g Feta cubed
Salad greens, lettuce or baby spinach leaves to serve
Parsley, Mint, or Coriander chopped finely (I used parsley and mint last night...my coriander has been a little strong lately) - about 1-2 tbs all up

When all the cooked ingredients are cool enough, dice the chicken as well and put all the ingredients (except the greens) in a large bowl. Mix well, then add the dressing and mix again (be careful not to destroy you avocado at this point!).

Serve in individual bowls on a layer of salad greens/lettuce/spinach and a glass or two of your favourite cider, outside...because food always tastes better outside.

 Enjoy!!

Friday 20 October 2017

Greatest Granola with the lot

As the long cold winter finally seems to be leaving us, so does the desire for warm, gooey porridge. In the past, I tried supposedly 'healthy' processed cereals and granolas, but I found that they were either way too sweet or pretty much like eating cardboard. So I decided I would try making it myself.

I found a recipe that sounded quite good, but have since modified and added to it substantially to the point where I think I can call this my own. It is fairly simple, and you can exchange many of the ingredients as you please. It is a very forgiving recipe - you can adjust most things (especially the dry ingredients) to your liking. Lately I have found some' "unstabilised" rolled oats that seem to make it lighter again. Served with plain greek yogurt and maybe a little fresh fruit, even hubby is getting into it.

Ingredients:
3 cups rolled oats
100g (or more) of nuts - I have been using a mixture of almonds and walnuts lately (I really like either slivered or sliced, but any will do. They are easier to eat if broken up a bit)
50g sunflower seeds
50g pepitas
2 tblsp sesame seeds
2 tblsp linseeds
1tblsp chia seeds
3tblsp coconut flakes or shredded
1/2 cup cranberries (if you can find with less sugar, that is great - I have found that Woolworths select have about 1/2 the sugar as Ocean Spray and no other sweeteners)
2 tsp cinnamon
2 tsp turmeric powder
2 tblsp cold pressed coconut oil, warmed to liquid
125ml maple syrup or rice malt syrup
2 tblsp honey (optional - maybe add a little more of the other instead)
1 tsp vanilla essence or paste

Method:
Turn oven on to 150 deg C and line two baking trays with paper.

Put all the oats, nuts, seeds, cinnamon and turmeric into a large bowl and mix well. Warm the coconut oil to liquid (either a quick zap in the microwave, or sit the bowl in warm water), and add syrup, honey and vanilla and mix well.

Pour liquid into the dry ingredients and mix until it is all coated.
Spread the mixture onto the trays as evenly as possible and pop it into the oven for about 15 mins. After this you can add the coconut (it tends to burn if in for longer), and remix on the tray. You can put the cranberries on at this point also, but they will go quite hard afterwards. Put the trays back in for another 12-15mins (watch it doesn't burn, particularly around the edges). Take out of the oven and place trays on racks to cool, sprinkling evenly with the cranberries. I tend to give it another move around on the tray at this point, otherwise I have found that it has very large chunks which are quite hard to break up when cool.

When it is completely cooled, break it up and put it into an airtight container. Serve with plain yogurt and/or milk, or just eat it as a snack from the container!


Tuesday 10 October 2017

Banana, Pear and Raspberry Loaf

There was some fruit that had been sitting on the kitchen bench looking at me for a few days. It had got to the stage where I knew no one would eat it, so it was time for some fruit bread. There was one pear, one largish banana, and then my daughter had come across some raspberries of indeterminate age, in the freezer. Remarkably, I had seen a loaf with this combination in a supermarket catalogue just earlier, so looked for a recipe. 

Unfortunately, none of the recipes really looked like what I wanted, so I amalgamated a couple to make the nice dense, moist sort of fruit loaf I felt like. I pretty much threw the ingredients in, so these amounts are a little rough. Hopefully it works for you!

Ingredients:

1 large overripe banana, mashed

1 very ripe pear, roughly chopped
2 eggs
2 tblsp coconut oil (or olive), in liquid form (very roughly)
2 large tblsp plain Greek yogurt (I used Jalna) (again, very rough)
½ - ¾ cup frozen raspberries
½ cup brown sugar (or less)
1 tsp cinnamon
2 tbs desiccated coconut
½ cup dark chocolate chips
1 ½ cups plain flour
1 ½ tsp baking soda

Method:

Turn oven on to 180°C (350F) and line a loaf pan with baking paper.

Mash banana in a large bowl, add pear, eggs, oil, yogurt and mix well. Try not to mash the pear too much, so there are some chunks left. Add the raspberries, sugar, cinnamon, coconut and choc chips and fold lightly through the liquid mix. Sprinkle the flour and soda on top and then fold lightly until all the flour is wet – don’t overmix (as for muffins).


Put the mix in the loaf pan evenly and pop in the oven for 45-50 mins. My oven tends to run hot, so it might need a little longer. When cooked (when a skewer comes out clean), let it cool a little in the pan, before removing it. Cool a little further (if you can wait) before slicing and eating. Delicious warm (while the choc chips are still gooey) and pretty good cold, too!

Family all thought it was yummy - love to hear your thoughts/experience.

Wednesday 2 August 2017

Cosy Food - Buckingham Biscuits

The recipe I am sharing here is one that I have never been able to find elsewhere, nor anything like it. I lost my copy a little while back, so was very relieved that my mother still had hers. It was one she used to make regularly for us when I was in my teens - great for those after school snacks as it contains the filling goodness of rolled oats and because it uses one saucepan and is really quick and easy. Successful with teens because it combines these with chocolate. 

Chocolate makes anything delicious, doesn't it?

And I have no idea why they are called Buckingham Biscuits, particularly as it is actually a slice rather than discreet biscuits. 

The original recipe is as follows:

Buckingham Biscuits:

1 ½ cups sugar (I have been using 3/4 cup of sugar quite successfully)
½ cup cocoa
¼ cup milk
125g butter

Mix these together in a medium large saucepan over low heat, bringing to the boil. Boil for one minute. Immediately take off the heat (watch it doesn't stick on the bottom at this point).

Add
½ cup peanut butter (crunchy is best) - I like to mix this in before adding the rest
2 tsp vanilla essence
3 cups rolled oats

Mix well and press into a lamington tray (approx. 25x30cm) lined with baking paper and cook for around 25 mins at 180 °C. I usually cook it a little less, as my oven runs a little hot – be careful not to overcook as it will become very hard, although you can always pop individual slices in the microwave for a few seconds to soften them up.

Leave to cool in tray, but slice into smallish fingers before it cools and goes hard. 

Try not to eat it all at once!

Now, here is my latest tweak. I have been experimenting with decreasing the amount of sugar as well as a couple of other exchanges.

I have reduced the sugar to around ¾ cup without losing the chewy toffee-ness. I have also exchanged half the butter (by volume, so ¼ cup of each) for cold pressed extra virgin coconut oil – I suspect you could do a complete exchange. Thirdly, I have experimented a little with some puffed quinoa or just straight quinoa, replacing about ½ cup of the rolled oats, which adds a little more protein and another texture (I think you could easily exchange more). You could also use cacao powder. I have also added a couple of handfuls of shredded coconut sometimes. So the final recipe looks more like this:

Buckingham Biscuits Version 2:
¾ cup sugar
½ cup cocoa
¼ cup milk
¼ cup butter
¼ cup cold pressed coconut oil

Mix these together in a medium large saucepan over low heat, bringing to the boil. Boil for one minute. Immediately take off the heat (watch it doesn't stick on the bottom at this point).

Add
½ cup peanut butter (crunchy is best) - I like to mix this in before adding the rest
2 tsp vanilla essense
2 ½ cups rolled oats
½ cup puffed quinoa

Mix well and press into a lamington tray (approx. 25x30cm) lined with baking paper and cook for around 25 mins at 180 °C. Be careful not to overcook as it will become very hard.

Leave to cool in tray, before cutting into slices. I do think this tends to be a little more crumbly than the original, which is probably due to the decreased sugar, but it still tastes great.


Tuesday 1 August 2017

Orange and Grapefruit Marmalade

As a young child, we lived on an agricultural college out in the western district of Victoria. There always seemed to be an abundance of fruit and I have fond memories of hot summer days spent preparing fruit for bottling and jam making (no air conditioning back then). Out would come the Fowlers Vacola preserving kit and occasionally, we would get to help put the fruit into the jars. My mother would cut up the fruit and my dad would make the syrup. There were apricots, peaches, pears and cherries. They all seemed so much bigger back then to the fruit we get today!

Making the jam required the hand mincer. We weren't allowed to turn the handle until we were a little older. Mostly it was apricot, strawberry and occasionally raspberry jam. It was always a great production line and seemed to take forever - but then most things do when you are only 3 or 4 years old! All our preserved fruit and jams where home made - we never had bought tinned fruit or jam until I was in my teens.

This was not the only time we made our own though. Come winter, it was time for marmalade. As a child, I didn't really like it, although when my grandparents came to visit, they would sometimes let me have the bit of their toast that only had the jelly part without the bitter skin. 

Again, I remember my mother and sometimes her mother as well doing the tedious preparation. Back then, all the fruit was sliced finely by hand, removing any thicker pieces of pith. Over time I have grown to appreciate marmalade. For many years it was my go to for breakfast, year in year out: marmalade on toast.

Once my mother had a food processor, she gave up slicing the fruit. It was much quicker and easier in the food processor. However, it gives a very different style to the marmalade - one that I really enjoy. First you don't get any jelly parts without fruit. Second you don't get big lumps (generally) of skin. It spreads a little more easily, too.

So here is the recipe my mother has always used. I think it was given to her by her mother. I have never found anything similar in shop bought varieties; the orange and grapefruit give it so much flavour.

My mother says that you make it in the months with a "u" in them (as in June, July & August), although that would only work in the southern hemisphere. Last year I made mine in late August, which I think is a little too late - the fruit is too ripe, so not as much pectin, which makes it harder to get to set. Now I just have to get my daughter to appreciate marmalade on toast (instead of Nutella!), so that it can head into the fourth generation.

Orange and Grapefruit Marmalade

3 Navel Oranges
2 Grapefruit (traditionally use yellow ones, but for the last few years I have defected to pink, which give a lovely sweetness)
1.75kg sugar
1/2 -1 Litre of water

Wash the fruit and cut into chunks, removing the white middle and any pips. Put the fruit into the processor in batches (I find probably one orange or grapefruit at a time is enough, so that it chops into even bits - you really don't want to turn it to paste with occasional large lumps!). Put processed fruit into a large bowl or container (I use plastic as I am not sure of the reaction of the acidity in the fruit with the saucepan overnight) and then add enough water to get a middling consistency - a bit like soup. Leave to soak overnight. If it seems a little dry in the morning, you can add more water - the worst that will happen if you have too much is that you will need to boil it longer.

In the morning, put it all in a large heavy based saucepan and bring to the boil. Give it a stir every so often to ensure nothing sticks. Boil until the fruit looks soft (about half an hour).

Add the sugar carefully and mix in. I know it seems a lot, but I have tried cutting back, and only ended up with marmalade that wouldn't set. (This might look like a lot of marmalade, but I do two batches at once, which usually lasts a whole year for me.)

Bring it all back to the boil - at this point you will need to get the temperature up a bit, but watch it: Boiled over jams are never fun to clean up!
Early stages of boiling

Now is the more tedious part as you just need to boil until it sets. It took me maybe about 1 1/2 hours. It will need stirring quite regularly, as well as watching - you also don't want to burn it. I have done that, too, and that is the end of the whole batch - the burnt flavour quickly goes all through!

At the beginning, it will be quite foamy and light coloured. As it cooks, the bubbles get bigger, the colour gets darker and it shrinks down (you will need to turn the heat up again to keep it boiling).

Towards the end
Towards the end, the amount has shrunk down considerably and there is a yellowish foam around the edges. The bubbles are clear.

When you think it is getting close to ready, test a little by dropping it on a cold plate. Allow it to cool and when you push your finger through the marmalade, it should stay where it is (not flow back). This part is the most subjective - in industry, they have a colour chart that shows when it is dark enough. Mine involves more guess work!

When you feel it is setting well on the plate, turn off the heat and pour into glass jars straight away. (Remember:it will be extremely hot at this point!) I use a little jug, and reuse well-cleaned jars from bought products. Put the lids on tightly immediately and you should get a good seal (make sure you wipe any spill first). I have always found it keeps for well over a year.


Tuesday 18 July 2017

Lentil and Vege Soup

This is another great winter warmer - really a meal in itself! Someone enjoyed it enough to ask for the recipe, so I decided I would blog it. Photos will come next time I make some.

I like my soups hearty and this one you could almost eat with a fork. Lots of veges and lots of flavour, a little on the Moroccan side. I didn't write it out as I made it, so you may need to adjust the flavours to suit. As with most of my soups, they are pretty rough in the amounts and even more forgiving toward any changes. You can adjust it to how you prefer.

Ingredients:

2 small onions sliced
4 short cut rashers of bacon, chopped into small pieces (optional (omit if you want it vegan) - could also use half as many full rashers)
2 cloves of garlic, minced
A large "thumb" of ginger, grated (about 2-3 tsps)
A long red chilli, chopped finely (more or less depending on how spicy you like it, or just remove the seeds!)
2tsp turmeric
2 tsp cumin powder
2tsp coriander powder
1tbsp smoked paprika
1/2-1 tsp fennel seeds (optional)
1-2 sticks of celery sliced
1 large carrot sliced
About a cup of sweet potato, diced (will pretty much cook down, just to add thickness and sweetness)
375g bag of green/brown lentils
1-1/2 cup of cooked kidney beans*
Around 400g can of crushed tomatoes (I have been using Ardmona with no salt or sugar added)
1-1 1/2 litres of water
2-3 tsp of Massel chicken style stock powder
1-2 handfuls of coriander leaves, roughly chopped
Greek yogurt

* (I cooked the kidney beans separately as I felt the colour would darken the soup a little too much. You could also use tinned beans or chickpeas. If you use dried chickpeas, my experience is they take much longer to cook, so would need to be cooked separately for about an hour.)

Method:

Before you start, get the kidney beans boiling in plenty of water in a separate pan - they need about 40+mins. Doesn't matter if they are not completely cooked before adding them to the soup, as they will continue to cook in it. In a large heavy based saucepan, cook the onions and bacon in about a tablespoon of coconut oil (or olive) on medium heat until the onions are clear. Add ginger and garlic and other spices and give a quick cook until fragrant (careful not to burn them - I prepare the veges earlier so they are ready to toss in). Toss the veges and lentils in to coat with the spices and then add enough water to cover the lot and the crushed tomatoes. After the soup has been cooking about 1/2 an hour, add the rinsed kidney beans. Check the water level and add more as necessary - the lentils will soak up a fair bit. It is now a matter of testing/tasting to check that the lentils and kidney beans are soft and adjusting the salt (if you didn't use bacon, you will probably need more) and other flavours to your liking. When you are happy, add the coriander (just before serving) and mix well. Serve in bowls with a good dollop of yogurt and crusty bread.


Monday 19 June 2017

Granma's Ginger Biscuits

One of my favourite memories from childhood is coming home from school when it was cold and wet and my mother had been baking. As we came in out of the rain and dried off in front of the heater, the room was steamy from our wet clothes and other clothes drying on the airer and there would be the delicious aroma of warm, freshly baked biscuits.

It makes quite a sticky dough
This recipe is one my Granma passed on to my mother and is treasured all the more because of the memories it engenders of Granma. It is similar to gingerbread in many ways, soft, chewy, spicy biscuits, perfect to warm you in every way on a cold winter's day. Just be careful not to overcook them or they will quickly become hard - although 5 seconds in the microwave does wonders to soften them up, or you can dunk them in your cuppa!

GRANMA'S GINGER BISCUITS

Roll the dough into logs
Ingredients: (metric)

225g golden syrup or honey 
2 ½ cups plain flour
½ cup sugar
1 egg
1 tsp baking soda
1 tsp ginger (I used 2tsp this time - it was quite spicy, but tasted great!)
1 tsp mixed spice
(I also added 1 tsp cinnamon)

Method:

Cut rounds about 1cm thick 
Place all ingredients in a bowl and mix thoroughly. You can start with a knife, but in the end, you just have to get your hands in and kneed it well. When it is completely mixed, roll portions into logs (not too long or they tend to squash down to nothing as you cut them). The logs are around 4 - 5 cm square. Using a well floured surface, slice off the biscuits at about 1cm intervals. Lay them on a tray lined with baking paper. Be sure they are well separated as they do grow substantially. 


Pop them in the (pre-heated) oven at cook for around 15 mins at 180° C, until just starting to change colour. As I said earlier, be careful not to overcook them as they will go rock hard!

Makes 30 - 35+ biscuits.

The finished product - especially delicious
when just out of the oven

Friday 9 June 2017

Not another foodie blog number 1 - Roasted Sweet Potato Soup with the lot

Roasted Sweet Potato Soup with the lot

My adventures in food preparation began when I was quite young. The first baking I remember doing was as a Brownie Guide, to get my cooking badge. I think it was hedgehog. I remember having to bash a plastic bag of biscuits with a rolling pin to make the crumbs – this was before the days of food processors.

As I continued this journey into my teens I think I nearly drove my mother mad with my need for constant reassurance that ‘this’ was close enough to half a cup or ‘that’ was a dessert spoon full. It took me a long time to relax with my cooking and realise that there is often a little lee-way with those measurements.

Back in the seventies, though, the average family wasn’t that daring with food. Most new recipes in our household came out of the CWA (Country Women’s Association) cookbook or from friends. For my family, a real shift came when my older brother did ‘Home Economics’ at high school - must have been a progressive school, as this was generally ‘girls only’ territory. He came home with a recipe for Spaghetti Bolognese. It was such a change from the bland stews, watery curries, lamb chops and roasts that were our standard fare. Not to mention that it was from another culture! (Moving out of home it was actually my signature dish - the only thing I really cooked - for some time, but that is another story.)

Fast forward a few decades. More recently, I have realised that I can actually trust my own instinct in cooking. While I might use another recipe as a basis, I find that often I can’t find one that uses exactly what I would like and so I have been experimenting more. This blog, therefore, is not just to share my creations, but also to record them so that I can remember what the heck I did next time I want to make that recipe!

Down here in the southern hemisphere, we have quite abruptly (or so it seems) entered into soup season - otherwise known as Winter! As it gets colder, I suddenly find myself desiring warming comfort food. What is better than soup to satisfy this craving?

I decided to make some soup a few days back for my husband - he had just arrived back from Indonesia (at some 30°C) to home, which was sitting at about 8 degrees. However, I really wasn't in the mood for my stock standard soups, so went on the hunt for something different. I had a couple of sweet potatoes, and the idea of sweet potato soup was quite appealing, so I started my search. Although a couple of recipes sounded ok and had a few nice ingredients, they all sounded a little bland given the sweetness of the sweet potato. (One recipe actually roasted the potato in maple syrup!)

Anyway, failing to find a recipe that combined all that I wanted, I decided to put them together and make my own. And even my daughter loved it, so I thought it must be ok! (Although she did ask, a little sarcastically, I may say, whether it was dinner or dessert - it was that sweet. However, she finished it up likety split, so can't have been too bad.)


So here it is (makes about 4 serves as a meal, unless you have someone like my hubby who will eat as many serves as you allow him!):

ROASTED SWEET POTATO SOUP WITH THE LOT

Ingredients:

2 medium size sweet potatoes
1 large carrot
1 clove garlic
1 onion
1 large red chilli
olive oil/cold pressed coconut oil
1-2 teaspoons of turmeric powder
chicken/vege stock powder
1 cup of coconut milk
coriander leaves
2-4 (shortcut) rashers bacon (depending how much you want!)
Greek yoghurt

How to:

Peel and cut up the sweet potatoes and carrot into chunks (the smaller they are, the quicker they'll cook - probably about 5cm chunks). Toss them and the peeled garlic in a little olive oil and place on a baking tray (I use baking paper to save on scrubbing!) in the oven at about 200° C for about 20-30 mins. They should be just starting to caramelise, but not burn and be nice and soft.

While they are cooking, chop up the onion and chilli and cook in a heavy based saucepan (at least 2-3 litres) with about 1 tablespoon of oil (I used coconut here) over medium heat until the onion is clear and just starting to caramelise. (They only need rough chopping as it will all be processed later)

When the veges are roasted, add the turmeric (I used about 1 1/2 teaspoons) to the onions and lightly fry until fragrant. (I usually turn the heat down with spices to make sure they don’t burn.) Then add the roast veges and toss through. Don't let it catch at this point - you don't want to destroy the turmeric flavour.

Add to this mix about 3 cups of hot water (depending how thick you like your soup - you can always add more later) and 1 cup of coconut milk. I use the Ayam brand coconut milk powder (1 sachet), in which case you may need more water. Add in 1-2 teaspoons of stock powder as well (I use the Massel powder, which is quite concentrated). Bring it all up to the boil, and when you are sure the veges are cooked through (which is probably quite quickly), take it off the heat and blend thoroughly with a stick blender (or can use a food processor, but I guess you would need to cool it a bit before putting it in).

Reassess the consistency - here you can either add a little more water (and stock if you want), or boil it down if it is a bit runny. From experience, it is always better to add less water to start and add more if you need it.

Meantime, chop the bacon into smallish pieces and brown until crispy in a small frying pan. Roughly chop a handful of coriander leaves for garnish.

Serve soup in deep bowls with a sprinkling of coriander leaves, bacon pieces, a dollop or two of Greek yogurt (or sour cream) and some nice crusty bread.

Enjoy!

NOTE FOR THE UNWARY: Use turmeric powder with care - it stains anything and everything yellow. The advice I got when looking up how to get turmeric out of clothes was to use scissors!! 

If you would like to something completely different, why not head over to my other blog at www.ruthembery.com/blog?


Friday 16 August 2013

A few of my favourite things

Lately I have become aware that I am not the only one noticing that our culture seems to have become obsessed with bigger and better experiences. Looking at Facebook, so many describe their lives using terms like "the best" or "the most (wonderful, fantastic, awesome)" to describe their event, spouse, child or whatever. Aside from the fact that I wonder where it leaves anyone else’s event, spouse or child, it would seem that even though many of us have more time and money to do all these things, most are still not satisfied or even happy. Even Jim Carrey, who would know, is quoted as saying I hope everybody could get rich and famous and will have everything they ever dreamed of, so they will know that it's not the answer.”

On the flip side, sometimes I feel like my life is made up of far too much of the mundane. Washing clothes, cooking meals and other menial household chores can feel like repetitive drudgery. Every now and then, though, I suddenly find the pleasure in doing them again. My latest cosy is a great reminder of the satisfaction I find in washing hanging out in the sunshine and breeze and the fresh smell the clothes have when you bring them in. 
As we get to the end of a long winter when I rarely bother to hang my washing outside, this cosy evokes the memories of summer, the scent of freshly mown lawns, the warmth of the sun, and crisp sheets waving in the breeze. The anticipation of the Spring and Summer to come re-energises me.

Doing another of those repetitive chores - the dishes - the other evening, I was struck by the homeliness of my wooden spoons. There is something about them that says "home" in a comforting way. The stories they could tell about the meals they have helped cook, and the fellowship and family that has been enjoyed and shared around those meals. And they also tell a story about me, as each spoon seems to have ended up with quite specific uses. I couldn't really tell you why, but I am quite obsessive about it.


Thinking about all these ordinary things, many of which we are trying to minimise our time on, by using dryers, dishwashers and now the thermomix, (which apparently does all these things and more – perhaps the next generation will call them “Mother”), I can’t help wondering whether perhaps we are losing more than we gain. Many an important conversation has been had over doing the dishes, as well as a lot of fun. Some of my fondest memories from childhood include preparing and preserving food. My mother preserved peaches, pears, apricots and cherries to name a few. Not only was it labour intensive but usually in the peak temperatures of summer. She also made all our jam at this time, and we used an old fashioned mincer as shown here.
Have you ever seen the number of interesting gadgets available for making cooking easier? There are hundreds and hundreds! Most of them I thought... As small children, we were excited when we were deemed old enough to turn the handle without the fear of losing our fingers. It was family time, where we bonded around preparing food for the colder months, but could also contribute to the well-being of the family as a whole. I think our children have missed out on something special here.


What are some of the simple things that give you pleasure, or memories of such you have? I would love you to share them here.

Thursday 11 July 2013

A Change of Brew

My second creation was for my little one-and-a-half cup pot. I saw this little 'tea-set' one Christmas and said to my husband that I thought it was sweet, and it ended up in my presents. The pattern in Tea Cozies 2 was for a standard size teapot, but I managed to "guesstimate" it down to size. By some good chance, I had some leftover wool from another project which worked perfectly for this little cupcake cosy.


At this point, I was really getting bitten by the creative bug. One of the problems with knitting these days, though, is finding wool stores. The other is that using a book published in the UK means trying to find equivalent wools in Australia, which is not always easy. Fortunately, the internet is generally a reasonable source of answers for this sort of thing. So, letting my fingers do the walking, I found a wool shop not too far away, and headed on down one Saturday morning to browse and get inspired. I came home with wool for another two tea cosies that I thought I would enjoy making. So the third one was the Purple Berry, partly because I found some wool I thought would work, and partly because the pattern was quite an unusual stitch that I'd never done before and I wanted to experiment. Although it called for knitting with two strands at once, because the wool was actually a heavier weight than the pattern, this seemed to produce a quite tight/stiff cosy, so I used a single strand instead. I think it turned out ok.


Starting this hobby is quite amusing to me. As a child, tea drinking was quite an integral part of my family life, so me being a non-tea drinker was a source of concern or at least cause for comment. Being the not only the middle child but also the only girl in five children, I already felt somewhat on the outer, and perhaps there was something of the perverse in me to extend those differences. Or perhaps it was because I was the first to definitely fall into the ranks of being Gen X, the generation of 'question everything' and so, I did not accept that just because it was 'normal' or 'accepted practice', that I had to conform. What a rebel!

However, there was a definite issue with me not drinking tea in at least my wider family and I have a fond memory of my grandma who felt that drinking tea was an important social grace that I did need to conform to. She despaired so much of my lack in this area that when I was staying with her at age 11, she decided that if I just drank some tea, I would get to the point of enjoying it. I remember her suggesting I add more sugar which, to me, simply made it taste like sweet dishwashing water. By my late teens, however, I found that I was actually more normal than I realised, having a number of other friends who drank neither tea or coffee. And my life as a non-tea drinker continued quite happily.

But, here I am, to all indicators of my early life, doing something totally unexpected and surprising. Perhaps it is a sign of (finally) growing up, or perhaps it is simply a normal part of the maturing process. Is there anything that you do now that no one would ever have expected from your childhood? Maybe yours is a little more exciting or unusual. I'd love to hear from you.


Tuesday 9 July 2013

Why tea cosies?

My life is about to radically change. For the last 13 years, I have been chief taxi driver, dictated particularly by the school bell. The last five and a half even more so due to the lack of before and after school care - there is only so much you can lean on friends. Anyway, my baby is about to finish her secondary education and shortly after will (God willing!) get her licence. And, so, my life will have a whole new freedom. The past three years I have been studying an MA (the MAVP at Tabor College, Victoria), and with that finishing and my parenting role going through yet another metamorphosis, I have been looking at what I do with my time.

Now, don't get me wrong, it is not about a lack of things to do. There is always plenty. The problem is more one of motivation and energy. There are only so many repetitive tasks you can do in a day without getting seriously de-energised. At least, that's the way it seems to go with me. I realised that I need to do creative things that I both enjoy the process as well as the outcome. The tea cosy idea came out of my time studying.

I  never was a tea drinker until more recently and though I'm not sure the reason why this changed, I have got particularly into green mint or just plain peppermint tea. When I was studying, I got into the habit of sitting with my pot of green mint tea. Better for the figure than snacking, and also good for keeping the fluids up (and getting you out of your seat every half hour or so for a loo stop). However, I discovered that, even in my little one-and-a-half cup pot, the tea was getting cold too quickly, and I realised that the tea cosies my grandmother always used (no matter how hot the weather) were actually very functional. My fascination with tea cosies, though, goes a long way back, as can be seen by the photo below. This is a particularly ugly one from the 1960's, but it obviously tickled my fancy!


Anyway, in one of those rare moments, my enjoyment of knitting, the need for all my friends and family to return to the  comforting days of having tea cosies, and my need for small craft projects collided with the fact that, as is often the case,  I am not the only one realising our need to return to keeping our tea warm in pots, rather than using endless, messy teabags. If you go looking, there seem to suddenly be a number of books of patterns for tea cosies (as well as actual tea cosies), one of which, my lovely daughter gave me back in April for my birthday. Since then, I have already knitted five, although two are still in the finishing stages. The first was for my sister-in-law's birthday, and is pictured here. And the book, to give credit where due, is Tea Cozies 2, published by GMC Books.


So here I am. Now it is time for you to put the kettle on, make a cuppa or a pot and share some of your stories, thoughts or creations as I continue to share mine.


Potato Salad with a lot of Difference...and chicken.

SERVES:4-5                           PREP TIME: 40-50 mins Summer is well and truly upon us in the Southern Hemisphere and I find myself...